How To Install Solar Panels On Roof

If you are considering installing a solar panel for your home, there are a number of things you will need to figure out – including the type, direction, and inter-connection system for your panels. Even if you decide to leave the actual installation work to a professional, it’s good to be aware of the basic concepts yourself – so that you can always make the right choices.
Types of Solar Power for Home
All solar power systems work on the same basic principles, converting sunlight first into direct current (DC) power and later, using a solar inverter, into alternating current (AC) power that can be used to power your home appliances or fed into the grid. The process looks something like this:
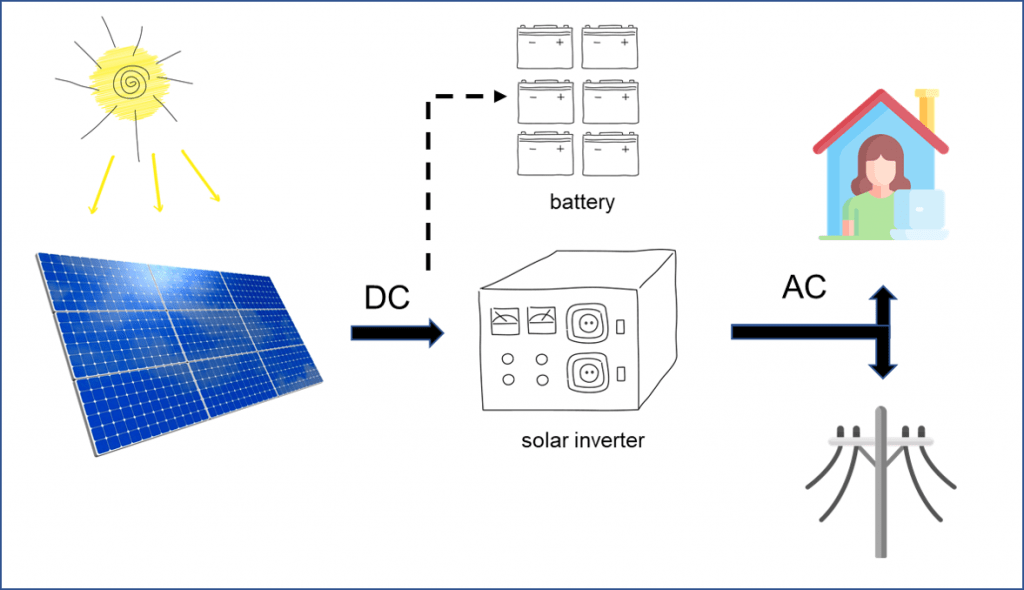
However, there are different types of solar panel installations, and understanding the differences between them can help you choose the one most suited for your needs. Let’s look at them one by one.
Grid Inter-tied (no batteries)
The most commonly used system and one that is the cheapest and easiest to install. It connects your solar panels to the grid without any kind of back-up or a battery. When your solar panel installation is generating power, your household consumes it and any excess power is fed into the grid. When the sun isn’t shining, you consume electricity from the grid.
You usually get paid a feed-in-tariff (FiT) or credits for the energy you export to the grid, though the exact conditions will vary based on what your utility provider offers. The downside? When a blackout occurs, your electricity will get disconnected as you have no back-up system in place.
Grid Inter-tied (with batteries)
A more expensive and technically challenging system to the one from the previous example. The main difference is that you have battery storage, which will kick in during a power outage to supply the stored unused power so that you don’t lose access to electricity.
However, this extra layer of comfort comes with a cost – though solar batteries are becoming more commonplace, they will still drive up the cost of your solar installation substantially. A 10 kWh battery for your roof solar panels will cost you anywhere between $10,000 to $15,000. This type of solar panel installation can be found in critical buildings, such as hospitals or fire stations that need to maintain access to power at all times.
Off-Grid Solar Power Systems
With this type of system, you are not connected to your utility or the electric grid and therefore you require battery storage. Installing solar panels of this type can be very tricky and expensive because they have to be designed appropriately so that they will generate enough power throughout the year and have enough battery backup to cover your needs.
As a rule of thumb, you shouldn’t choose this type of solar panel installation, if you live in an urban, densely populated metropolitan area.
Different Types of Solar Panels
To produce electricity, solar cells are made from a semiconducting material that converts light into electricity. There are three major types of solar panels – monocrystalline, polycrystalline, and thin-film, and one that has recently entered the market called concentrator photovoltaics.
| Solar Panel Type | Pros | Cons |
|---|---|---|
| Thin-film |
|
|
| Polycrystalline |
|
|
| Monocrystalline |
|
|
Monocrystalline (Mono-SI)
Both monocrystalline and polycrystalline solar panels have cells made of silicon wafers, but monocrystalline solar cells are cut from a single, pure crystal of silicon. You can identify a monocrystalline solar panel installation by appearing as a single, flat color. They are high efficiency, high-cost option.
Polycrystalline (p-Si)
Polycrystalline solar cells are also made of silicon wafers, which are assembled from fragments of silicon crystals that are melted together in a mold before being cut into wafers. They are thought to be slightly less efficient than monocrystalline panels, but thanks to a lower cost they are a popular choice for roof solar installations.
Thin-film (A-SI)
These solar panels are made of a variety of materials and their biggest selling point is the thinness and flexibility of the material. On the other hand, they are considerably less efficient (4 – 12% efficiency) than crystalline PVs (up to 20% efficiency).
Concentrator Photovoltaics (CPV)
Solar panels installed with this technology use lens or curved mirrors to focus sunlight onto small, high-quality multi-junction (MJ), and highly efficient solar cells. They are the most efficient type of solar panels and are predicted to expand rapidly within the market over the next few years.
However, you won’t find the CPV solar panels installed on the roof as they are (at least for now) almost always designed and intended for ground installations.
Types of Mounting Systems
There are two different mounting types that you (or your contractor) will need to choose from when installing solar panels – a direct mounted or ground framework. The choice will depend on the shape, size, and type of the shingles of your roof.
Direct Mounted
Direct mounted solar paneling is installed directly onto the roof of your house. The roof systems utilize space that usually goes unoccupied so you don’t lose active areas of your property to panels. Placing your panels on the roof also prevents damage to the solar panels, such as from falling debris.
Ground Framework
If your roof isn’t a good fit for solar panel installation, you can also mount the system into the ground. Ground framework installation can be fixed or follow the sun for maximum sunshine exposure.
When should you choose ground framework installation? This mounting is ideal when you have a lot of unused space on your property, with the direct exposure from sun up to sundown.
How To Install Solar Panels Step By Step

Installing a solar power system on your roof is one of the best decisions you can make. The panel will pay for itself in approximately 7 years and should generate annual savings of approximately $2,500 after that. However, improperly installed solar panels can wind up costing you in the long-run.
If you decided to DIY it, you want to follow the instructions to a letter. Since you are going to be working with electrical circuits, you definitely should not be installing solar panels without the right technical expertise. If you feel like a solar panel installation is above your skill level, don’t worry. You can hire professionals to do it for you, to ensure it’s done just right.
You are still here? Alright, let’s look at how to install solar panels step by step.
1. Find the best location.
One of the most important factors, affecting the yield of your solar panel will be the direction it faces. You of course want to maximize the amount of sunlight it’s exposed to. If you live in the U.S., you most probably heard that your solar panels should be facing south. However, that is not always correct.
In certain situations, you want your solar panel to absorb the maximum sunlight during critical peak hours, which are usually in the mid- to late afternoon. That means you might want to make them face west.
Do you want to find out more about the best direction for your rooftop solar system? Read our Are Your Solar Panels Facing The Wrong Direction article.
2. Build the platform.
Based on the length and width of the panels you have in mind, build the area for placing the modules using metal or aluminum rails. Now, this is some serious DIY work, but luckily there are many instructional articles and YouTube videos on how to do it.
3. Mount the panels.
Use brackets, bolts, or clamps to mount the panels onto your platform. Screw retaining clips onto the rails to ensure that the panels are secure. Of course, we shouldn’t have to remind you to be very very careful to avoid injuries or damages. Leave this work to a day with good weather and ideally, have someone else at home to give you a hand if needed.
4. Wire the solar modules.
Now that you mounted the solar panel on the roof, it is time to move on to more electrical work. You will need to wire the solar modules together using junction connectors or a fuse combiner box. Then, connect the exterior wiring with the interior control panels.
The wiring stage is very important but can be dangerous. That’s why you shouldn’t carry it out yourself, unless you are a qualified technician, or have sufficient experience with installing solar panels. Make sure you familiarize yourself with some key electric terms and concepts before you start.
5. Ground the system.
If your mounting system is metal, it should be earthed. The grounding rods of the solar installation should remain six inches above the ground. Grounding the panels will protect you from an electrical shock and will protect your roof solar panel from a power surge from lightning.
6. Connect the electrical components.
Finally, connect the electrical components properly. The connections between the panels, charge controller, battery, and the inverter have to be all correct. You can then direct the power from the inverter to the main electrical control panel of the house.
Different Types Of Mounting Structures For Solar Panels
One of the largest areas of innovation within solar panels for house involves the mounting system. If you decided to mount your solar paneling directly on the roof, here are the mountain systems available for your roof type.
Sloped roof mounting systems
The majority of the roofs are sloped and will require some type of penetration or anchoring to install solar, either by attaching to rafters or directly to the decking.
- Rail-less systems – Solar panels are attached directly to hardware connected to the bolts/screws going into the roof. The panels are not limited by the direction of the rails and can be positioned in any direction.
- Shared-rail systems – Two rows of solar panels are clamped together on a shared middle rail and attached to the top and bottom rails.
Flat roof mounting systems
If you have a flat roof or a very slight tilt, you will need to use a “foot” or a tray-like tilted structure that sits on top of the roof to install your panels. Flat roof mounting system materials range from aluminum and stainless steel to plastic and polymer, making the installation quick and easy.
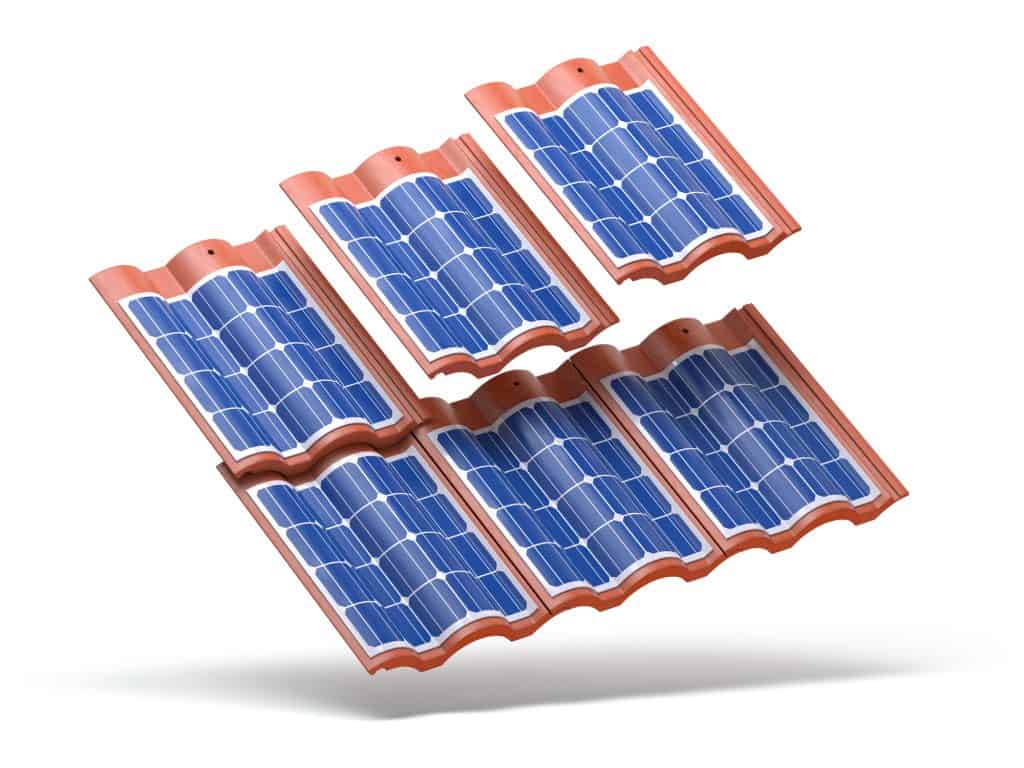
Solar shingles and BIPV
For people concerned with aesthetics, this might be the right answer. Solar shingles are built into the structure, meaning that no mounting system is needed.
Updated on


Add Comment
You must be logged in to post a comment.