Homeowners Guide in Solar Panel Installation [8 Steps to Follow]
Solar panel installation does not come cheap. If you would like to skip contractors for the installation process and save some money in doing so, this is the article for you. As solar power becomes more popular in the US, solar panel installation becomes a necessary skill for many new workers. Here, we will see how you can skip the solar installation company in your area by following our own installation guide.
Our comprehensive installation guide takes you through DIY solar system installation step-by-step, over the solar system designing, through purchasing necessary solar system components, all the way to placing the solar components on your rooftop. Whether you want to connect your solar panel system to the electrical grid or not, our solar panel installation guide has got you covered.
Selecting the Most Optimal Location
When selecting the most optimal location for your solar panel installation, you should understand that solar panels can only achieve their maximum solar output in direct sunlight. All solar panels should be facing the sun for most of the day and be clean, with no obstructions to the sunlight. There are several factors to consider when installing your solar panels:
- The general orientation of your solar array – for the most part, the solar array should be facing South. This is to say that your solar panels will receive most sunlight during the day;
- The tilt of your solar panels also plays an important factor. A lower tilt means that more energy is produced during the year’s summer months. A higher tilt (more vertical positioning) means that more power is produced during wintertime. Tilt plays a major role in solar power output;
- Shading – Shading is significant so it should be considered, especially since even a small shade covering 10% of your solar panel can reduce power output by 50%. The internal wiring of any solar PV system demands that most of the panels be exposed to direct sunlight.
Preparation Before Installing Solar Panels
Before installing or even purchasing your Solar PV system components, there are several factors to consider as well. Once you’ve checked your location and the tilt of your roof, it is time to deal with more technical aspects of your solar panel system. These factors to consider include, but are not limited to:
- Solar system size,
- Materials needed,
- Equipment needed for a successful installation,
- Safety equipment and considerations,
- Your technical knowledge.
Solar System Size
Your solar panel system size is determined by several factors. The system size will also dictate the price of the entire system and will ensure that 100% of your energy needs can be met through installation. Our solar panel installation guide offers a detailed breakdown of the factors that can influence how many panels you may need. The factors determining the size of your system are as follows:
- Your energy needs – the more energy you use every day, the more panels you will need to install;
- Your rooftop orientation – the less south-facing your roof is, the more panels you will need, as they will not be able to reach their maximum power output,
- Your rooftop tilt – the further the tilt from the ideal, the more panels you will need to install,
- Shading – the more shading there is, the lower the solar power production rate…
An average US home needs anywhere between 5 and 10 kW of solar panels installed. The bigger the house surface area and the worse the insulation, the more power you will need to keep the house both warm and cool. The safest bet is to have a look at your energy bill and your average daily hours of sunshine. You can now divide your annual energy usage by the number of sunny hours your area receives in a year, and you will get the size of your solar system. Ensure you add 10% on top of this number to account for efficiency losses over the years.
A very good way to save money initially on your solar system is to run a home energy audit. This simple energy use check can reduce your energy consumption and ensure that your system needs are smaller. It may seem a trivial matter, but an energy audit alone can reduce your solar panels’ cost by more than $10,000 if you live in an older house.
Materials & Equipment Shopping Checklist
Purchasing materials and equipment needed to install solar panels on your own can be a big headache, especially as there are so many system components to take care of. To make your job easier, we’ve compiled a shopping list for those who want to go solar. There are several items on this solar shopping list:
– solar panels (always choose the best in your price range),
– inverters (string solar inverters have proven to be the best),
– racking (or solar mounting system – it ensures stability and roof integrity remains intact),
– performance monitoring and charge controller (most solar inverters come with a digital display that gives you information on power production and other important indicators), and
– a solar storage option (a solar battery bank).
Solar Panels
You should always choose the best solar panels you can afford. This will ensure their longevity and a low deterioration rate. As you know, your solar panels will lose some of their efficiency over their lifetime. As most solar panels are rated to keep 80% of their efficiency over a 20-year period, you should choose high-quality panels to ensure that your panels can last even longer. Tesla, SunPower, REC, and LG are all top solar panel manufacturers.
Solar Battery
Energy Storage is an important part of any off-grid solar system. A solar storage solution, like a Tesla Powerwall 2, can store energy for later use in the day once the sun is down. Ensure you get the right size of the battery (or as many batteries as you need), as a single one may not be enough for you. An average US household uses around 30 kWh of power a day, and a typical solar battery can hold no more than 10 kWh of power. You should bear in mind that the battery should last you anywhere from a single night to a few days when the sun is behind the clouds.
Charge Controller
In case you have a solar battery, you will also need a charge controller. A charge controller is a nifty piece of equipment that monitors how much power is delivered to your solar storage unit. It serves to protect your batteries and ensure their longevity. It is always advised not to connect your batteries straight to solar panels, as damage and even fire may take place.
Inverter
Your solar panel system is useless without an inverter. Very few appliances could work without it, so make sure you buy one and make sure you invest. Once you have an idea of how many panels you want to install and how many Amps your system will be produced in direct sunlight, you can purchase the best solar inverter you can find. Always ensure to purchase an inverter that can handle the Amps coming in from your system. If you are in doubt, go for a bigger model, as you can keep it in case you decide to expand your solar system array.
Miscellaneous Parts
Whether you buy a solar panel kit or decide to design, purchase and install your solar panel system all by yourself, your DIY solar system installation needs some miscellaneous parts as well. To ensure you stay within legal limits and that your solar energy system is safe for everybody to use, you should always check with your local municipality office – state and local regulations may differ from one area to the next. Miscellaneous parts you will need for your solar panel installation include:
- Wiring – you need to know the proper wire diameter and length for your project,
- AC Breakers – they are required to help the AC energy flow through the system,
- AC Disconnects – these boxes should always be lockable and locked whenever not in use,
- PV Meter – if your local utility does not provide a smart meter for grid-locked solar systems, you may have to install one yourself. Note that you only need a PV meter in on-grid solar PV system installation,
- Proper Junction Boxes – you should check local regulations to ensure all electrical components (including the junction boxes) are of proper material, size, and color.
- Conduits – while some states allow EMT (Electrical Metallic Tubing), some demand that ENT (Electric Non-metallic Tubing) be used to guide the wiring from your solar panel to other solar system components.
- Mounting elements and materials – Mounting elements and materials differ based on whether you want a roof-mounted or stand-alone solar panel system. You will also need a mounting rack and a strong sealant to prevent any leaks and wind damage to the roof structure.
Overall Cost Calculation
Once you know the size of the solar PV system you need and other elements of your solar array, it is time to calculate your overall cost. As solar panels differ in each state (i.e., solar panels in Texas do not cost the same as solar panels in Pennsylvania), you will need to check with your local retailers. A battery bank or a simple battery backup will also add to the overall cost. Your racking system type, the size of the solar inverter, wiring, and all other electrical work will cost considerably as well.
So, why install a solar system? Well, as electricity bills rise all over the world, more and more homeowners want to invest their money and see big savings on their energy bills for years to come. The rule of thumb is that the higher the price of your electricity (per kWh), the faster your payback rate. Consider Hawaii, for example: with over $0.30 per kWh of electricity, the payback time is sometimes as short as four years! In most US states, however, the payback is anywhere between 7 and 12 years.
Safety Considerations
Solar panel installation includes a lot of heavy lifting, climbing, and working at unsafe heights. Ensure your safety, the safety of others near you, and the safety of the overall roof structure by practicing safe measures and wearing protective equipment at all times. Here is what you need to understand before DIY solar panel installation:
- Personal Protective Equipment,
- Fall Protection,
- Dig Safety,
- Electrical Safety, and
- Heavy lift safety.
Personal Protective Equipment
Your head, eyes, and body have to be protected at all times during your solar panel installation. As this is a dangerous job, you should stay safe at all times. This means you should:
- Wear protective equipment – eye protection, a hard heat, closed-toe boots, and appropriate clothes are a must in solar panel installation,
- Appropriate clothing – use clothes made of sturdy, high-quality materials that will not easily rip or let nails or drill bits through,
- Eye protection must be high grade. Polarized lenses are always a better option, as your view will not be obstructed by the glare of the sun,
Fall Protection
Fall protection is a necessary element of safety during solar panel installation. Falling down from the roof can cause serious injuries to the head and to the back, as well as fractured bones and concussion. Always ensure that the following safety measures are followed:
- Roof anchors,
- Safety harness,
- Roof-ready, non-slip boots with closed toes,
- Scaffolding (can be rented),
- Only do the solar panel installation when it is weather-permitting – hail, snow, strong wind, and rain all make the roof more unsafe than it already is.
Dig Safety
When digging to install a ground-mounted PV system, you may think that you are safer than on the roof. However, buried power lines, water pipes, sewage lines, septic tanks, and gas lines all pose a danger to your safety and health. Ensure to always:
- Contact the local municipality office and inquire about any pipes running through your property,
- Also, inquire about drilling safety – some properties may be in an area that can potentially experience landslides,
- Avoid low-hanging phone and electrical lines,
- If driving or operating heavy machinery, always respect the safety measures. If you are unsure about how to operate a piece of machinery, hire a professional operator,
- When mixing concrete for the foundation to your ground-mounted PV system, always wear protective equipment:
- Safety goggles,
- Safety gloves,
- Safety boots, and
- A mask that can prevent you from inhaling concrete fumes.
Electrical Safety
Since you will be working with a lot of wiring and since every solar panel can produce some electric charge even when not connected to the house wiring, you will also need to consider electrical safety measures before installation. An electric shock can cause serious injuries, burns, and cardiac arrest and can knock you unconscious. For this reason, consider the following electrical safety measures:
- Ensure that wires are not damaged, pinched, or snapped,
- Keep a multimeter with you at all times – check every connector, soldering point, and wire before working with them. Even a small PV system is a powerful electrical system that can be hazardous,
- Ensure all wires that need stripping are striped using torque wrenches,
- Remove all metallic objects from your body, including jewelry and piercings – in case you have metallic dental implants, an insulin pump, or a pacemaker, you should avoid doing solar panel installation by yourself.
Heavy Lift Safety
As your solar panel installation means lifting a lot of weight, especially in roof-mount systems, you should ensure your roof is structurally sound. Roof mounts add considerable weight to your roof structure, and experiencing any issues can result in serious damage. Furthermore, you should ensure your own safety and use machinery to do the lifting for you whenever possible. During lifting your solar panels, do the following:
- Lift with your legs – to avoid back injury,
- Hold the weight close to your body,
- Do not twist or bend over,
- Be sure you’re wearing protective boots,
- Ask for help – sometimes, even the presence of another person can ensure extra safety – two pairs of eyes see better than one.
Solar Installation: Step by Step Process
Once all previous steps are taken care of, it is time for solar panel installation. This solar panel installation guide takes you step-by-step and ensures that all the necessary wiring, placement, and elements are there. Please bear in mind that this installation guide is for informative purposes only and that nothing can guarantee your safety and the safety of your equipment as a licensed solar system installer can. These are the steps in solar panel installation:
- Mount Installation,
- Solar Panel Installation,
- Electrical Wiring,
- Connecting the System to the Solar Inverter,
- Connecting the Solar Inverter and the Solar Battery,
- Connecting the Solar Inverter to the Grid, and
- Start the Solar Panel System.
- Solar Panel Maintenance
1.) Mount Installation
The first step in solar panel installation is the mount installation. The installation that is mounted requires some mounting materials and special equipment, such as drills, nuts, and bolts. Before you proceed with the roof mount, bring in a professional to ensure there is enough space on your roof and that your roof is strong enough. This is to make sure no damage appears as you install your solar panels. There are three types of solar mounts:
- Pole Mounts – perfect for poles. They are frequently used in cities and highways to provide renewable energy for street lights.
- Roof-Ground mount – suited for flat-roof buildings. Once the ground mount is in place, solar panels are propped and held at an angle by a special structure.
- Flush Mount – these are the most common mounts on residential houses. They consist of metal bars with space for wiring to run through them.
If you are installing panels on a residential home, the third type – the flush mount, is the preferred type. The bars are installed on your roof, and any points of entry through the roof shingles or tiles should be carefully taken care of: there will be a number of holes like this, and each one represents a leak and wind damage potential that should not be overlooked. Before installing the mounts, please take exact measurements and ensure the structural integrity of your roof.
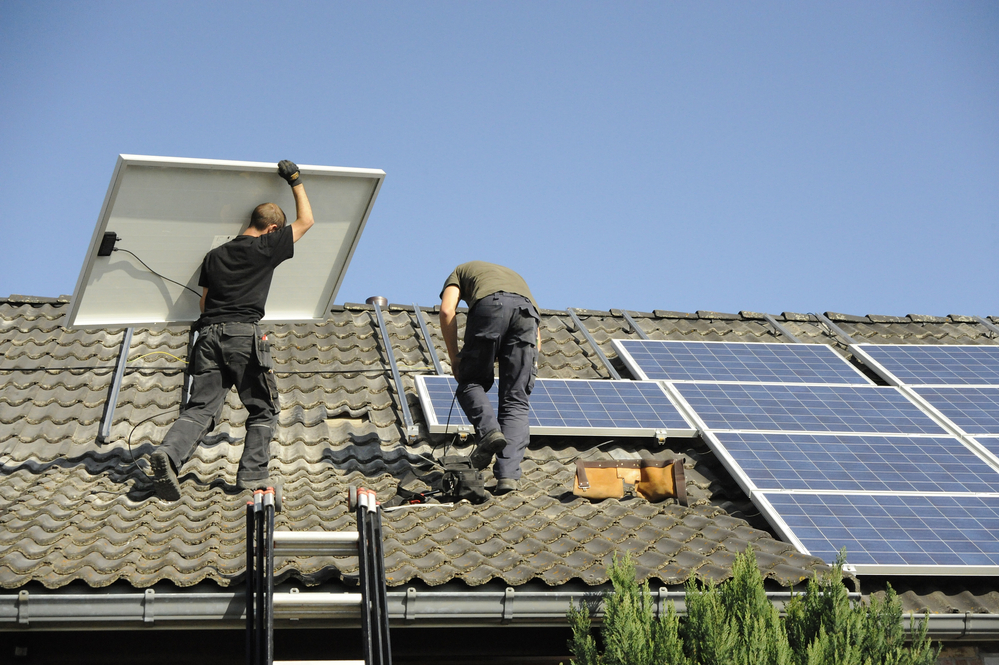
2. Solar Panel Installation
Once the flush mount bars are secured, solar panels are placed on top of them and screwed into place. The wiring is guided by the bars themselves. If that is not so, you may be required to use EMT conduits to lead the wires. Check local regulations to ensure compliance.
When screwing your solar panels into place, ensure they have a good connection to the racking system. Standardized screws should be used, and instructions provided followed to the minuscule details. Proper wire size, junction box for any connections, and all other electricity safety measures have to be taken care of.
Solar panel placement is important as well, especially in roof-ground mounts. Higher tilt angles generally mean more solar power is produced, although there is a limit: most of the US needs around 18 to 36-degree tilt for the best performance and cost-effective operation. This way, you will get the most solar energy per solar panel installed.
3. Electrical Wiring
During the wiring, you have to pay special attention to the connectors. They should all be cleanly stripped before you proceed with the following steps. The universal MC4 connectors are used, and they are compatible with most solar panels in the US market. The wiring can be done in two ways:
- Parallel connection – this type of connection connects the two positives to each other and the two negatives to each other as well. This type of connection has no effect on the overall system voltage;
- Series connection – connects one positive connector to one negative, this type of connection increases the overall system voltage.
4. Connecting the System to the Solar Inverter
Connecting the system to the solar inverter is the next step in our solar panel installation process. This is done by connecting the positive end coming from solar panels to the positive terminal of your solar inverter. The negative end coming from the solar panels is, likewise, connected to the negative terminal of your solar inverter. When choosing the solar inverter, pay attention to that it can handle more Amps than your solar array produces.
5. (Optional) Connecting the Solar Inverter and the Solar Battery
Connecting the solar inverter and the solar battery bank is an optional step. As solar battery banks are not cheap, many homeowners decide not to install them. Your utility company may offer net metering, in which case you do not even need a solar battery bank. In net-metering enabled areas, your utility acts as a battery.
In case you still want to have a backup battery or want to be off-grid, you can purchase a solar battery and connect your solar inverter to it. In this case, you connect the positive terminal of the battery to the positive terminal of the inverter. By the same analogy, the two negative terminals (on the battery and on the inverter) are connected.
6. Connecting the Solar Inverter to the Grid
The next step is connecting the solar inverter to the grid. To do so, you need to make a connection to the main power switchboard. The output wire is connected with the electric board that supplies electricity from the grid. Again, in case you have a net metering policy in place and a smart meter installed, you may want to contact your utility and check with them on how to properly connect your new source of renewable electricity.
7. Start the Solar Panel System
To start the solar panel system, simply switch on the main power switchboard. Depending on the model of your solar inverter, it may have a display to show its status and solar power output. Some may also show the status of your solar battery, such as whether the battery s being charged or not.
8. (Additional) Solar Panel Maintenance
Once they are up and running, your solar panels require little to no maintenance. Most of the time, the rain will take care of cleaning your panels, and you may rest assured that they will keep producing electricity for 20-25 years to come. You are still required to check the wiring, the solar inverter, the battery bank, and the ground mount or flush mount structure. In case of prolonged droughts, sand storms, or if you live in a particularly polluted area, you may want to clean your panels with a soft brush and water.
FAQs
Which is the best solar inverter for home?
Fronius, SolarEdge, and Huawei are considered to be the best solar inverters for residential use. Every solar installation needs a solar inverter as well. Installing a reliable inverter with a higher capacity than your solar system will ensure the longevity of use and peace of mind. Fronius Primo has kept the first place for almost a decade now, and with their extended online warranty, that is exactly how much warranty you get – full ten years.
Can solar panels cause fires?
No, solar panels cannot cause fires by themselves. However, improperly wired solar panels, a bad solar inverter, or bad overall installation can cause fires. For this reason, you should always opt for the best solar panels in your area. Solar panels are an expensive piece of equipment, and not following the installation process and installation guide can cause expensive damage.
How often should solar panels be checked?
Your solar panels should be checked at least once a year. This means cleaning the surface of the panels, especially after a long winter, checking for any cracks or corrosion, as well as for faulty or damaged wiring. The rest of your solar system should be checked as well, including your solar inverter and your solar batteries. Your solar system is expensive, so make sure that only licensed professionals do the checking.
Can I remove my own solar panels?
You should never remove your own solar panels. A solar system costs a lot to purchase and install. Once this is done, you should rely on professionals for any cleaning, checking, maintenance work, and removal. Removing solar panels, just like installing them, requires expensive tools and expertise that you may not have. In addition to this, you need to know about wiring and fire hazards to avoid any injuries or property damage.
Conclusion
If you want to install solar panels on your own, you need to have a good step-by-step guide while doing so. This is exactly what we wanted to achieve while at the same time teaching you about installing solar panels and about all the necessary safety measures. Needless to say, this guide is far from complete, as only aged professionals know all the details that need to be paid attention to. For this reason, when in doubt, always consult professional solar installers and do not try to fix any damaged equipment on your own.
Updated on